
A single missed egg can lead to a new infestation within your home or apartment. You must follow specific steps to ensure the treatment reaches every hiding spot. This preparation is the most important factor for a permanent solution.
Understanding how to prepare for bed bug treatment is the first step toward a pest-free home. Residents should begin by washing all bedding in hot water and clearing all clutter from the floors to allow Associate Certified Entomologists to access every crevice where pests hide. The Environmental Protection Agency (EPA) notes that reducing clutter removes common hiding spots. Vacuum all floors and furniture thoroughly, seal your mattress in a certified cover. And use modern solutions like Aprehend biopesticide for 90 days of protection with less intensive prep than older methods.
Book your professional bed bug treatment today and let our certified experts guide you through every step of the preparation process.
You may feel overwhelmed by the task of clearing your entire home for an exterminator. However, following these guidelines ensures that the treatment can reach every crevice where bugs hide. Proper preparation helps you avoid a failed service and a repeat infestation.
Proper bed bug treatment preparation is the difference between a one-time solution and a recurring problem. Success depends on a team effort between the resident and the pest professional. When you prepare correctly, the treatment barrier reaches every crack and crevice where bed bugs hide. Unprepared spaces leave safe havens where insects survive and multiply after the exterminator leaves.
How To Prepare For Bed Bug Treatment: Why Proper Bed Bug Treatment Preparation Is Critical
Success in bed bug control is a team effort between the resident and the pest pro. When you learn how to prepare for bed bug treatment, you are doing more than just cleaning your home. You are creating the best path for a total cure. Correct prep work makes the work of the tech much more helpful. If the space is not ready, the bugs may find a safe place to hide from the treatment. This can lead to the bugs returning even after the pro leaves.
The Role of Integrated Pest Management
Proper preparation is a key part of Integrated Pest Management (IPM). This method uses a smart, scientific plan to solve pest issues without using too many chemicals. Ace Bed Bug Exterminating uses this way of working to find a long-term fix for its clients. By following the right steps, you help the treatment reach every small crack where bugs live. The Environmental Protection Agency notes that clearing clutter is a big first step to remove hiding spots. Removing these items gives the bugs fewer places to stay safe.
IPM is not just about killing bugs once. It is about making the home a place where they cannot live. Your help is needed to make the room ready for the tools and products the team will use. When you follow the guide, you make the area less friendly to pests. This joint work is the only way to get rid of a tough infestation in a big city like New York.
How a Professional Inspection Guides Your Plan
You should not start big prep tasks before a pro looks at your living space. A full check finds the exact spots where bugs are nesting. This data helps the pro choose the right way to treat your rooms. You should schedule a bed bug inspection to get a clear map of the problem. This step ensures that you do not waste time on tasks that do not help. It also keeps you from moving things that might have bugs on them.
Each home has its own unique layout and needs. In some cases, moving items too soon can make the problem worse by spreading bugs to clean rooms. A pro plan helps you avoid these mistakes. It also keeps your family safe while the team works to clear the pests. You must follow the guide to make sure the bugs do not have a place to stay. Knowing what to do first will save you stress and help the treatment work the first time.
How Do You Prepare Your Mattress and Bedding for Bed Bug Treatment?
The bed is the most likely spot for bed bugs to hide. These pests stay close to their food source and find shelter in the small gaps of your mattress. Learning how to prepare for bed bug treatment means making the bed a tough place for these insects. You must start by stripping all linens, pillowcases, and blankets. Place these items in plastic bags before you take them to a laundry room. This stops the spread of the problem to other parts of your home.
Start by stripping all bedding and sealing it in plastic bags before moving it to the laundry. Remove everything stored under the bed and inspect each item for signs of infestation. Apply bed-bug-proof encasements to your mattress and box spring, install interceptor cups under each bed leg. And pull the bed frame at least six inches away from the wall. These five steps create a barrier between you and the pests while the treatment does its work.
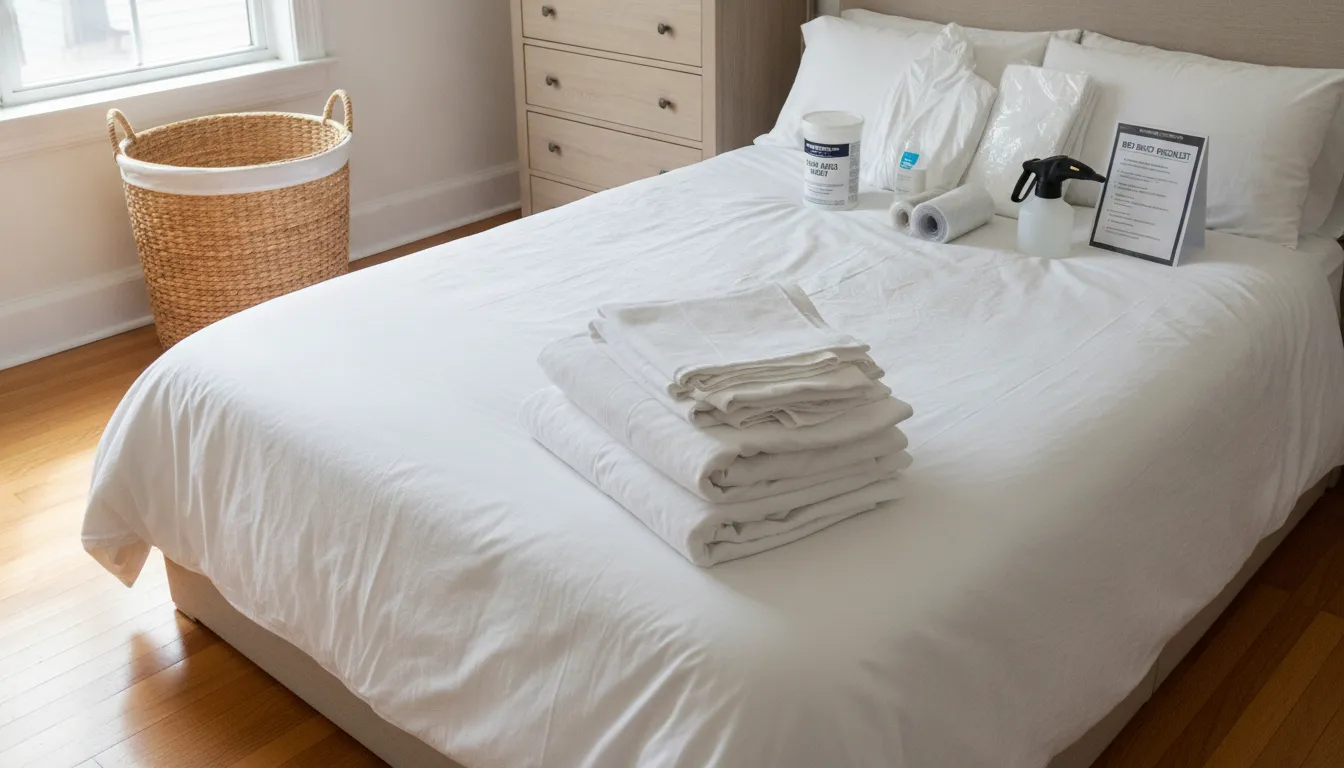
Clearing the Space Under the Bed
Bed bugs often hide in items stored under your bed. These items provide many safe spots where insects can lay eggs. You must remove all storage boxes, shoes, and loose items from beneath the bed frame. Do not move these items to another room, as this may spread the bugs. Instead, keep them in the same room while you work. You should inspect each item for signs of bed bugs before you clean or discard them. This process is a key part of preparing your home for a successful treatment visit.
Using Bed-Bug-Proof Encasements
A bed-bug-proof cover or encasement is a special bag that zips around your mattress and box spring. These covers use fabric that bed bugs cannot bite through or escape from. When you seal a mattress inside a cover, any bugs trapped within will in time starve to death. This stops the bugs from reaching you and stops new ones from finding a home in the mattress. The Environmental Protection Agency (EPA) says these covers are a good way to protect your bedding.
Installing Bed Bug Interceptor Cups
Interceptor cups are small plastic traps that you place under the legs of your bed frame. These traps have a smooth outer wall that insects can climb, but the inner walls are too slick for them to get out. This helps you find the bugs and stops them from climbing onto the bed. You should pull the bed at least six inches away from the wall so bugs cannot crawl from the wall onto the bed. This makes the bed a safe island during the treatment process.
- Remove under-bed storage. Pull all items out from under the bed frame. Keep these items in the same room to stop the bugs from spreading.
- Inspect and clean stored items. Check every box for live bugs or black spots. Wipe down hard items and place soft items in a hot dryer.
- Apply mattress covers. Slide a bed-bug-proof cover over your mattress and box spring. Ensure the zipper is fully closed and locked.
- Set up interceptor cups. Place one trap under each leg of the bed frame. Check these traps every day to see if you catch any bugs.
- Move the bed away from walls. Pull your bed frame six inches away from walls or furniture. This stops bed bugs from using walls to reach your bed.
Proper bed prep creates a wall between you and the pests. These steps help the treatment work better and give you peace of mind. By following these rules, you make it easy for experts to find and kill every bug in the room.
How Should You Wash Clothes Before Bed Bug Treatment?
Washing your clothes is a vital step when you get ready for a bed bug service. You must handle all fabrics with care to keep the bugs from moving to new areas. A small error can spread the pests to other rooms in your home.
Heat is the only reliable way to kill bed bugs and their eggs in fabric. Place all clothing, bedding, and linens in a household dryer on high heat for at least 30 minutes before washing. After drying, seal clean items in new plastic bags immediately. Keep dirty laundry in sealed clear plastic bags and empty them directly into the washing machine to prevent bugs from spreading through your home.
Dry with High Heat
You must use high heat to kill bed bugs and their eggs. Washing items in water is good, but the heat of the dryer is what kills the pests. You should place your clothes and bedding in a household dryer for at least 30 minutes at a high heat setting. This ensures that no bugs or eggs survive in the fabric. The Environmental Protection Agency states that high heat is necessary to kill these insects.
Wash and Seal
Washing alone may not be enough to do the job. You must follow a strict plan to keep your clean items safe. Once you dry your clothes, place them in new plastic bags right away. Seal the bags tight with tape or a knot. This step stops bed bugs from getting back into your clean laundry. Keeping clothes sealed helps you stay ahead of the problem while the treatment is being applied.
Manage Dirty Items
Do not let dirty clothes sit out in the open. Use clear plastic bags for items that still need a wash. This prevents bugs from crawling out of the hamper and into other spots. When you take the bags to the laundry room, empty them directly into the machine. Throw the old bags in a trash bin outside your home to stay safe. Proper care of your fabrics is a key part of professional bed bug control for any NYC home.
How To Declutter Your Room for Maximum Treatment Access
Bed bugs are small and flat. They hide in very tight spots that are hard to reach. If you have many items on the floor, the pests have more places to stay safe. Taking away clutter is a key first step because it removes these hiding spots. This work is a big part of preparing for a professional treatment and must be done well.
Keep all items in the infested room until the exterminator clears them as safe. Trash and old papers should go into sealed plastic bags and directly to an outside bin. Vacuum floors and baseboards daily, paying close attention to cracks and corners. Seal the vacuum bag in a second plastic bag and dispose of it outside. Pull furniture six inches away from walls, tape outlet covers, and caulk gaps around baseboards to eliminate hiding spots.
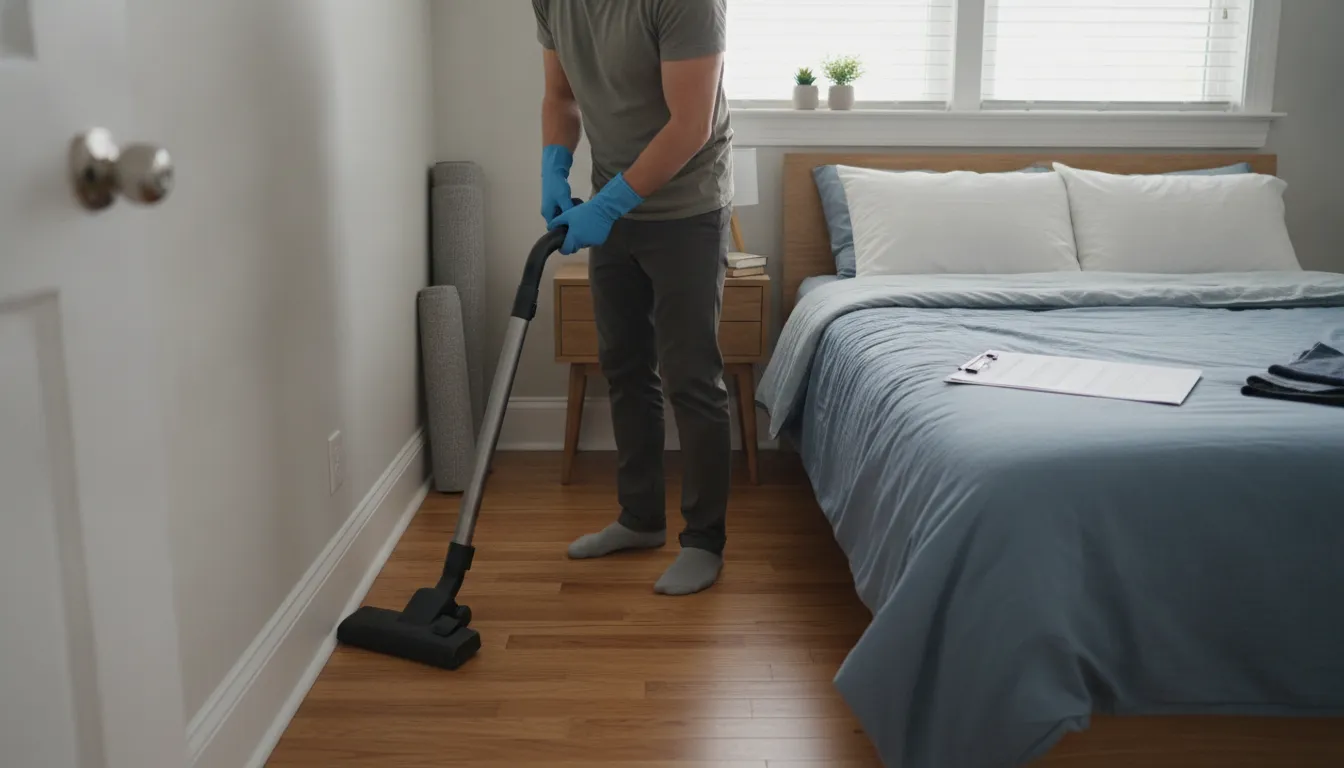
Clutter Reduction and Room Safety
You must not move items from a room with bugs to a clean room. This mistake is a common way that people spread the pests. Keep all items in the room where the bugs were found until the pro tells you they are safe. You should only take items out if you follow strict rules for cleaning them first. Trash and old papers should go into plastic bags right away. You need to seal the bags tight as soon as they are full. Carry the bags directly to an outside bin. This move stops any bugs in the trash from crawling back into your home. Fast trash removal is key to keeping the pests from moving to other rooms.
Vacuuming and Disposal Rules
A good vacuum is a strong tool for bed bug removal. You should vacuum the floors and baseboards every day before the pro comes. Pay close attention to the cracks in the wood. A strong pull will lift bugs and eggs out of their hiding spots. The EPA rules state that you must seal the vacuum bag in a second plastic bag after you finish. Put that bag in a trash bin outside. If you use a vacuum with no bag, you must empty the cup into a plastic bag and seal it. Then, wash the cup with hot water and soap. This step ensures that the vacuum does not become a new home for the bugs.
Detailing Wall Fixtures and Furniture
Small bugs can hide in the soft hair of the brush or the folds of the hose. They can also hide behind the plates on your walls. You should check each wall switch and light outlet for signs of bugs. Small dark spots near the plugs can mean bugs are inside the walls. You can tape the rims of the plates or use caulk to seal the gaps. This move stops bugs from crawling into the wall voids where they are hard to kill. Pull all furniture at least six inches away from the walls. This gap allows the pro to reach the baseboards easily. When there is a clear path around the room, the spray can cover all the spots where bugs stay.
How to Prepare a Small NYC Apartment for Bed Bug Treatment
Studio and one-bedroom apartments present unique challenges when preparing for bed bug treatment. Limited square footage means there is rarely a second room to move furniture into, no basement or garage for overflow storage, and sometimes no easy way to clear floor space. In New York City, where apartments are compact and storage is at a premium, preparation requires a more strategic approach.
Focus on clearing floor space near beds, sofas, and baseboards—the areas treatment targets most. Use sealed contractor-grade garbage bags for items you would normally move to a basement or garage; in small NYC apartments, double-bag and store them in the bathtub or a designated corner. Have a plan for Murphy beds, pull-out couches, and built-in shelving: the treatment team needs access to the wall behind and underneath. Clear shared hallway areas of personal items so the team can set up equipment, and use sealed bags for kitchen trash when you lack outdoor access. Every square inch counts in a small space, so prioritize access to treatment zones over moving everything.
If you live in a studio or one-bedroom, your exterminator can walk you through a room-by-room plan. Many Queens apartments, including studios, benefit from this targeted prep approach because it minimizes disruption while still ensuring full treatment coverage. The goal is not to empty your apartment—it is to clear the pathways the treatment team needs. If your apartment is in Williamsburg, ask about Williamsburg bed bug treatment and the preparation steps that fit your space.
Coordinating with Building Management and Neighbors
In New York City, bed bug treatment is rarely a single-unit affair. Bed bugs travel through wall gaps, pipe chases, and electrical outlets in shared-wall buildings. Proper coordination with building management and neighbors can mean the difference between a one-time fix and a recurring problem.
Notify your building management or super at least 48 hours before scheduled treatment. Under NYC Local Law 55, cooperatives and condo boards must have integrated pest management plans—your super may already have a protocol. Ask management to inspect adjacent units (next door, above, and below) because bed bugs frequently travel through wall voids. When informing neighbors, use a tactful approach: share a brief notice from your exterminator rather than causing panic. For hallway, stairwell, and elevator transit, bag all belongings in sealed plastics before moving them through common areas to prevent dropping bugs in shared spaces. Many Bronx apartment buildings with shared hallways benefit from this coordinated approach.
Your exterminator can provide a template notification letter for management and neighbors. This keeps communication professional and ensures everyone understands the process without unnecessary alarm. Check with your building about service elevator access if you are in a high-rise—this can save hours on treatment day.
Landlord and Tenant Responsibilities for Treatment Prep
New York City housing law divides preparation responsibilities between landlords and tenants. Understanding who does what prevents disputes and ensures the treatment proceeds on schedule. For a complete breakdown of NYC bed bug laws, see our detailed guide on landlord and tenant responsibilities.
Under NYC law, landlords must provide access for treatment, fix structural issues that contribute to infestations (holes in walls, cracked baseboards, ripped flooring, plumbing gaps), and maintain a pest-free environment. Tenants are responsible for washing and heat-drying linens and clothing, clearing clutter from floors, providing access to all rooms and closets, and following the exterminator's preparation checklist. In rent-stabilized units, landlords cannot charge tenants for bed bug treatment. For NYCHA units, the housing authority coordinates treatment and provides preparation instructions. If you need a local Manhattan exterminator or Brooklyn pest control specialist, contact us for building-specific guidance.
Document your preparation steps with photos. If a dispute arises about whether the unit was properly prepared, photographic evidence protects both tenants and landlords. Your exterminator can provide a preparation checklist that satisfies both parties' obligations.
What About Pets, Plants, and Safety During Treatment?
Safety is the most important part of pest control. While new methods work well, they need you to take steps to keep your family safe. Understanding what to expect before the exterminator arrives helps you plan for these needs in advance.
All pets must leave the home before treatment begins, including dogs, cats, birds, and small animals. For fish tanks, turn off air pumps and cover the top with plastic. Move house plants to a porch or untreated room. In high-rise buildings, use a secure pet carrier to transport pets through hallways and elevators—avoid bringing them through potentially infested common areas on the way out. For large plants, coordinate with your super to use the service elevator. All people must stay out of the home for at least four hours after the treatment is applied to let the spray dry and settle. Residents who cannot easily leave a high-rise building should plan ahead: identify a nearby cafe, park, or friend's apartment where they can wait out the four-hour re-entry window. Children, seniors, and anyone with respiratory conditions should wait longer and consult their doctor before re-entering.
Pet and Plant Safety Rules
You must move all pets out of the home before the work starts. This rule is for dogs, cats, birds, and small pets. For fish tanks, you must turn off air pumps and cover the top with plastic. You should also move house plants to a porch or a room that is not being treated. This keeps the plants safe and out of the way. Moving pets is a key safety step. Animals could get in the way of the work or touch the treated areas too soon. Keeping the home clear of pets lets the expert work fast and well. You can learn more about our professional bed bug control methods on our site.
The Four Hour Wait Time
All people must stay out of the home for at least four hours after the work is done. You may not go inside for any reason during this time. This wait lets the spray dry and stay in place. The Centers for Disease Control and Prevention notes that following wait times is a vital part of home safety. Children and seniors should be the last ones to go back inside. If a family member has health goals or breathing issues, you should talk to a doctor first. Our team can give you fact sheets about the tools we use to show your doctor. Proper timing helps the treatment work well and keeps everyone safe for a long time.
How Professional Aprehend Treatment Minimizes Prep Stress
Good bed bug control relies on a solid plan. At Ace Bed Bug Exterminating, we use Integrated Pest Management (IPM) to handle pests. This method combines some tools to get the best results. If you choose the right method, you can save a lot of time and effort. Most people fear they will need to throw away their beds or bag every book they own. With the right tools, this is not true.
The Benefits of Aprehend Treatment
Our main tool is Aprehend. This is a special biopesticide made from fungal spores. Unlike old chemical sprays, it does not need a lot of work from the client. You do not have to bag every item in your home or empty every drawer. The spray stays active for a long time. It gives you 90-day residual protection. This means the spores keep working for three months after we spray them. The spores stick to the bugs when they walk over a treated area. Then, the bugs take the spores back to the nest to kill the others. This transfer makes the treatment very strong even with less prep.
Prep is still vital for any plan. The Environmental Protection Agency (EPA) notes that cutting clutter is a big first step. It takes away the spots where bugs like to hide. With Aprehend, you focus on clearing the areas near the bed and couch. You do not need to wash all your clothes unless we find bugs in them. This makes the process much easier for busy New York families. You must leave the home for four hours after we finish the job to stay safe. This re-entry time lets the spray dry and settle.
Comparing Treatment Prep Needs
Every method has its own rules. Heat treatment needs you to leave many items in the room so the heat can kill the bugs. Old chemical sprays often need you to move all furniture away from the walls. Aprehend is much simpler. We apply it in narrow strips where bugs travel. You just need to make sure we can reach those spots. This cuts the heavy lifting you have to do before the team arrives. By not moving too many things, you also lower the risk of spreading the bugs to other rooms in your home.
| Prep Task | Old Chemicals | Heat Treatment | Aprehend Prep |
|---|---|---|---|
| Clutter Removal | Extreme | Moderate | Minimal |
| Laundry Volume | Whole House | Minimal | Targeted Only |
| Move Furniture | Yes | Yes | Only for Access |
| Safety Re-entry | 4 to 6 Hours | 6 to 8 Hours | 4 Hours |
| Protection Time | 14 to 30 Days | 0 Days | 90 Days |
Lowering Your Stress Level
The thought of cleaning your whole home can feel like too much. Using a low-prep method helps you stay calm. You do not have to live out of plastic bags for weeks. Our experts guide you through the small steps you need to take. This targeted approach keeps the bugs from moving to new rooms. It also ensures the treatment works the first time. We want to help you get back to a good night of sleep without the usual prep stress. Our team will show you exactly what to do to get the best outcome.
Frequently Asked Questions
Do I have to sleep in my bed after bed bug treatment?
You should continue to sleep in your normal bed after professional treatment. This action encourages bed bugs to cross the treated areas as they seek a host. If you move to another room, the insects may follow you and spread the infestation to new parts of your home. Professional methods like Aprehend biopesticide rely on this movement to ensure the insects come into contact with the treatment for successful removal.
How long do I need to stay away after bed bug treatment?
You must observe a mandatory four-hour re-entry period after a professional treatment application. This safety protocol allows the treatment to settle and dry completely before you return to the space. According to Ace Bed Bug Exterminating, this window is necessary to protect residents and pets. Always confirm the specific re-entry instructions with your exterminator to ensure your home is safe for occupancy.
What should I do with my fish tank before bed bug treatment?
You must protect fish and other aquatic life during the removal process. Cover the tank with a heavy plastic sheet and seal the edges with tape to prevent airborne particles from entering the water. You should also turn off the air pump to avoid drawing in air from the room. These steps are vital because fish are highly sensitive to many pest control products used to kill bed bug infestations.
Should I move furniture before bed bug treatment?
Do not move furniture out of the infested room or to other areas of your home. Moving items can spread bed bugs to non-infested locations. You should leave large furniture pieces in their original positions unless your specialist requests a change. Professionals need to treat the furniture where it currently sits to ensure they address all hiding spots. Follow the guidance of your Associate Certified Entomologist for the best results.
How do I clean my house after bed bug treatment?
Wait until the four-hour re-entry period has passed before cleaning. After returning, you may vacuum floors and surfaces but do not mop or wipe down baseboards where the treatment was applied. Avoid washing or replacing mattress encasements for at least two weeks. Leave interceptor cups in place and check them daily for signs of bug activity. Contact your exterminator before cleaning any treated areas to confirm the timing is correct for your specific treatment plan.
Ready to Get Your Home Treated?
Preparation is the most important step in bed bug elimination. With the right approach, you can ensure that your treatment works the first time and keeps your family safe. The team at Ace Bed Bug Exterminating is ready to help you through every stage of the process, from inspection through post-treatment follow-up.
Book your professional bed bug treatment today and let our Associate Certified Entomologists handle the rest.
One Response